
Fermented rice water hair care is basically rinsing your hair with rice water that’s been allowed to ferment for a short, controlled time—then diluted—so you get the slip and strengthening feel without the “why is my scalp angry?” aftermath. To keep it safe at home, follow this method: rinse rice, soak 10–15 minutes, strain, ferment 12–24 hours max at room temp, then refrigerate and use within 5–7 days. Also, always dilute (start 1:3) and patch-test if your scalp’s moody.
I’ll be honest: when I first tried it, I over-fermented a jar on my counter because I thought “more ferment = more benefits.” Instead, my hair felt weirdly stiff, and my scalp wasn’t amused. So, this post shares the method I wish I’d followed from day one—safe times, storage rules, dilution ratios, and a simple 2-week schedule you can actually stick to.
Quick side note (because hair and skin always overlap): if you’re building a routine overall, a basic korean skincare set can be a nice “done-for-you” option while you’re experimenting with hair rinses. For example, I’ve bought sets like that during busy weeks when I just couldn’t be bothered to research 12 separate products.
what’s fermented rice water hair care, exactly?
It’s a hair rinse made from rice water that’s been left to ferment briefly. As fermentation progresses, the liquid becomes more acidic and develops a “sour” smell. Because of that, timing and dilution matter so much—too strong, and you can end up with dryness, irritation, or extra frizz.
People use it because it can make hair feel smoother and more resilient. Notably, rice water contains starches and small amounts of proteins, plus compounds like inositol that are often mentioned in hair-care circles. Still, the “miracle growth potion” claims online can get a little… enthusiastic, so think of it as a supportive rinse that can improve feel and manageability when used correctly.
How do you make a fermented rice water rinse safely at home?
If you only take one thing from this post, take this: short fermentation + refrigeration + dilution. In other words, that combo is where the safety lives.
Ingredients and tools
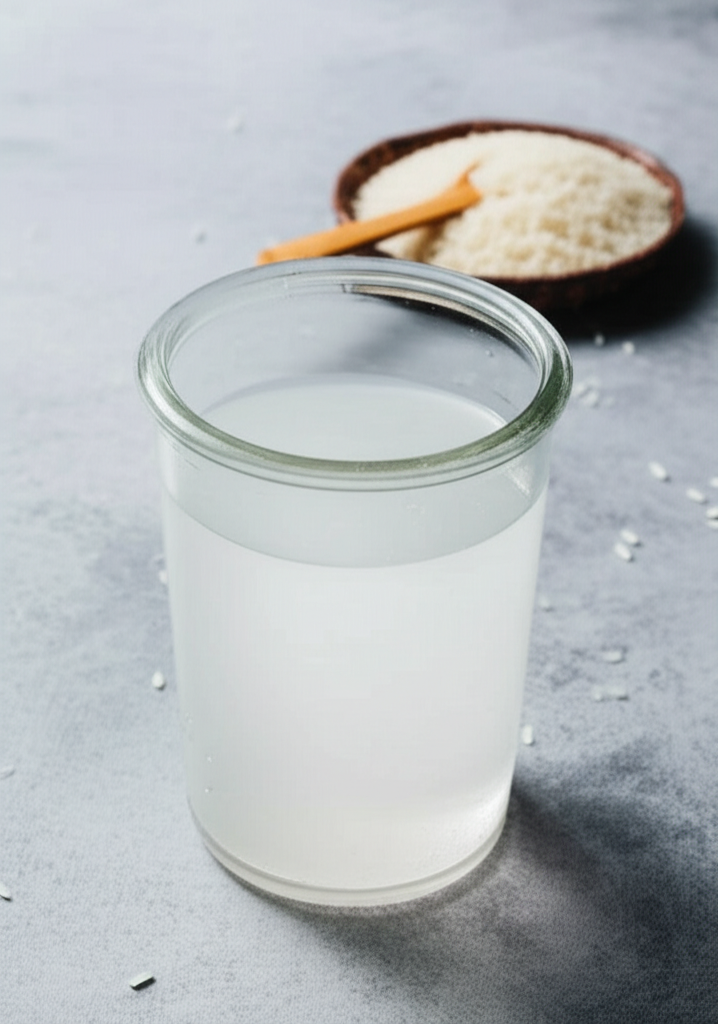
- 1/2 cup uncooked rice (white rice is fine; jasmine works; brown rice is okay but can smell stronger)
- 2 cups clean water (filtered if your tap water’s harsh)
- A clean bowl and a fine strainer
- A clean glass jar with a lid
Step-by-step method (safe fermentation times)
- Rinse the rice 1–2 times. Swirl with water and pour off the cloudy water. This reduces debris and extra surface starch.
- Soak. Add 2 cups of clean water to the rinsed rice. Let it sit 10–15 minutes, stirring once or twice.
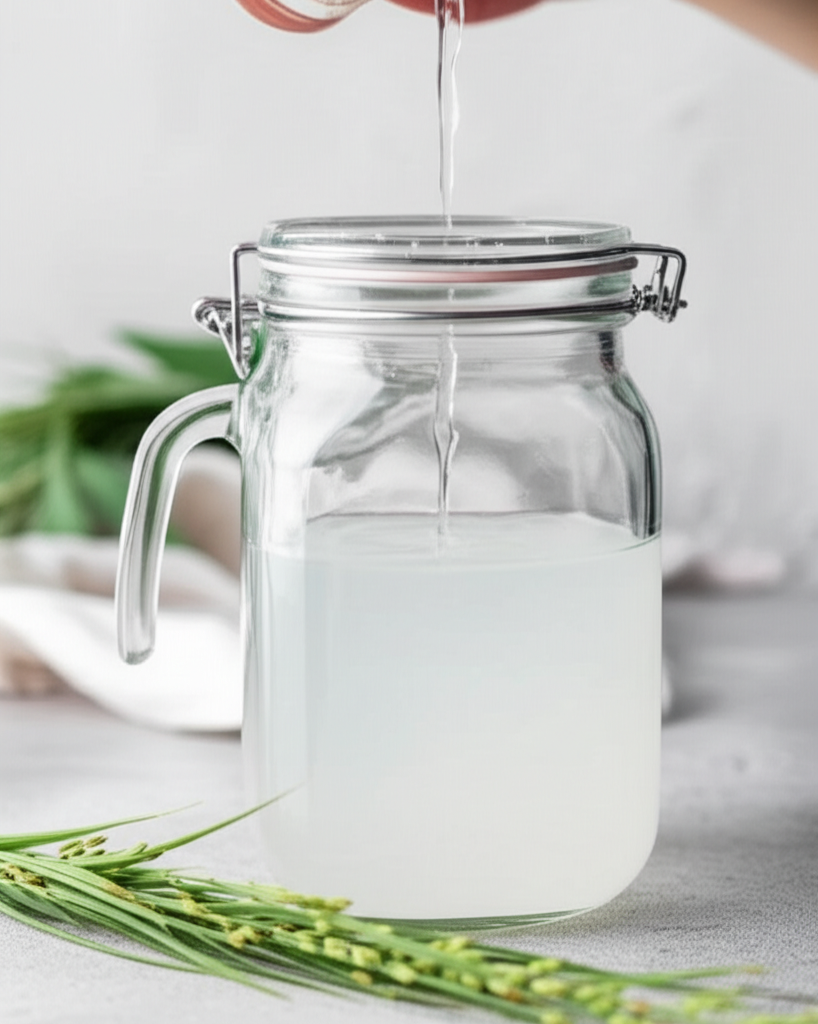
- Strain. Pour the liquid into your clean jar. Keep it simple, and don’t leave rice grains in the ferment jar.
- Ferment at room temperature for 12–24 hours. Put the lid on loosely or use a breathable cover. If your home’s warm (above ~75°F/24°C), stay closer to 12 hours.
- Stop fermentation by refrigerating. Tighten the lid and place it in the fridge immediately.
How to tell it’s “done” (without getting weird about it)
- Smell: slightly sour, like mild yogurt or sourdough starter.
- Look: cloudy is normal; foam can happen; fuzzy mold isn’t normal.
- Feel: slippery/starchy between fingers, not gritty.
Safety rule: if you see mold, or it smells rotten (not sour), toss it. Don’t “strain and hope.”
Storage rules (so you don’t accidentally brew a science project)
Fermented liquids keep changing if you let them. Therefore, storage’s non-negotiable.
- Refrigerate right after fermenting.
- Use within 5–7 days. After that, the risk of contamination and overly acidic liquid goes up.
- Keep the jar clean. Pour out what you need—don’t dip fingers in.
- Optional: freeze into ice cubes for single-use portions (handy, and it slows down further changes).
For food safety basics on refrigeration and microbial growth, the USDA’s cold storage guidance is a solid reference: USDA leftovers and food safety.
Best dilution ratios (to prevent scalp irritation)
This is where most people mess up. For instance, liquid that’s too concentrated can leave hair stiff, coated, or straw-like—especially if your hair’s protein-sensitive. Also, fermentation lowers pH, which is great in moderation, but rough when it’s strong.
Start here (beginner-friendly)
- Sensitive scalp / first time: 1 part to 4 parts water (1:4)
- Most people: 1:3
- Very oily scalp + sturdy hair: 1:2 (go slow)
How to use it in the shower
- Shampoo (or co-wash) like normal.
- Then, pour the diluted rinse over scalp and lengths, focusing on mid-lengths to ends.
- Next, massage lightly for 30–60 seconds.
- After that, let it sit 2–5 minutes (don’t marinate your scalp for half an hour).
- Finally, rinse thoroughly, then condition.
If your water’s hard, buildup can happen faster. Interestingly, the USGS notes that about 85% of U.S. homes have hard water: USGS: Water hardness. In that case, keep dilution higher and use a clarifying shampoo occasionally.
Who benefits most from rice water rinses?
I’ve seen the best “wow” results in a few specific cases. Notably, it tends to shine when hair needs better slip and a bit of reinforcement.
- Dry, rough-feeling hair: The starchy slip can make detangling easier, therefore reducing mechanical breakage.
- Low-porosity hair: Used lightly and diluted, it can add smoothness without heavy oils (which sometimes just sit there).
- Breakage-prone ends: As a pre-conditioning rinse, it can help hair feel more “together,” especially after heat styling.
Who should avoid it (or be extra careful)?
Some scalps just don’t like fermented anything. Also, certain scalp conditions can flare with the wrong DIY.
- Sensitive, reactive scalp: Start at 1:4, do a patch test, or skip it.
- Dandruff or seborrheic dermatitis: Fermented liquids can be unpredictable; you don’t want to experiment during a flare.
- Protein-sensitive hair: If protein products make your hair crunchy, you may overdo it fast.
- Open sores / irritated skin: Don’t apply anything acidic to broken skin.
And yes, if you’ve got persistent scalp scaling or itching, it’s worth reading clinician-backed guidance first. For example, the American Academy of Dermatology has a straightforward overview of dandruff causes and care: AAD: Dandruff.
A simple 2-week usage schedule (the one I actually stick to)
More isn’t better here. In fact, most people do great with 1–2 times per week. So, here’s a realistic two-week plan that won’t hijack your life.
Week 1
- Day 1: Use diluted rinse (1:4 if sensitive, otherwise 1:3). Leave on 2–3 minutes.
- Day 4–5: Regular wash day, no rice water. Pay attention to scalp comfort and hair feel.
Week 2
- Day 8: Repeat diluted rinse. If week 1 felt great, you can move from 1:4 to 1:3.
- Day 12–14: Optional second use only if your hair feels soft and your scalp’s calm.
Personally, I keep it at once a week most of the year. Meanwhile, if I’ve been heat styling a lot, I might do twice a week for two weeks—then I’ll back off again.
Signs you’re overusing it (don’t ignore these)
This is the part people power through, then wonder why their hair “suddenly hates everything.” If you notice any of these, pause for 1–2 weeks and clarify once.
- Straw-like, stiff lengths right after drying
- More tangles than usual (especially at the ends)
- Itchy scalp within a few hours after use
- Flakes that weren’t there before
- Dullness or weird coating even after conditioning
Can fermented rice water hair care help hair growth?
It’s a fair question, because TikTok makes it sound like your hair will grow three inches by next Tuesday. Realistically, it’s more about reducing breakage and improving the feel of the hair you already have. As a result, your hair may seem like it’s growing faster because you’re retaining length.
For context on hair growth rate: healthy scalp hair typically grows around 1 cm per month (roughly 0.4 inches), though it varies. The Cleveland Clinic mentions this general pace in its hair overview: Cleveland Clinic: Hair.
And, research from the American Academy of Dermatology Association notes that most people have about 100,000 hair follicles on their scalp: AAD: Hair care basics. That’s why reducing day-to-day breakage can make such a visible difference over time.
Finally, a 2024 consumer survey by Statista reported that over 40% of respondents who used DIY hair treatments did so to address dryness and frizz. That lines up with why this rinse often “feels” like it works: it boosts slip and manageability when you don’t overdo it.
My “keep it safe” checklist (quick recap)
- Ferment 12–24 hours, not days.
- Refrigerate immediately; use within 5–7 days.
- Dilute at least 1:3 (or 1:4 if sensitive).
- Limit to 1–2 uses per week.
- Stop if you get itch, flakes, stiffness, or extra tangles.
If you like seeing the texture and consistency before you try it, the video above is a helpful visual. Plus, I’m a “show me the jar” kind of person, so I get it.
Also, if you’re the type who prefers an “already formulated” approach for skincare while you DIY your hair routine, I’ve seen people pair this with a simple routine like Illuminatia (linked below). I’m not saying skincare affects your rinse directly—however, keeping your overall routine consistent makes it easier to spot what’s actually causing irritation.
Summary: fermented rice water hair rinses can be a nice add-on if you keep fermentation short, store it cold, and dilute it generously. In practice, the people who love it most are usually dealing with dryness, low porosity, or breakage. Meanwhile, if your scalp’s sensitive or you’re battling dandruff, it’s smart to skip—or at least proceed like you’re handling a strong active.
[content-egg-block template=offers_list]